Driving in the Philippines: Converting UK license to Philippine license

One of the more frustrating moments for visitors to the Philippines is always going to be when government bureaucracy is at play. None more so than converting your driving license to the Philippine version, assuming you are staying longer than 3 months. For US visitors it is much simpler, it seems, but for those of us from the UK, the following may be of interest. There are three types of license in the Philippines – Student, Non-Professional and Professional. For normal driving in a car, you need the non-professional type. Professional licenses are for taxi drivers and public service vehicle drivers, and student permits are for, well… learners. You will need to go to the Land Transportation Office (LTO) in Quezon City. Conversions for UK drivers cannot be done anywhere else. Be assured that the people you will deal with there all speak very good English – you do not need any help with translations. They can also be extremely nervous about speaking English – so be patient, be calm, and don’t get upset if things don’t go your way. The (armed) guards will remove you if you are causing a scene. Bite your lip, say thank you a lot, and learn from the experience if you get anything wrong and have to come back. In general, they are good people doing a tough job and don’t deserve abuse just because you don’t understand the processes, or it is different to what you expect. Just remember, it’s more fun in the Philippines, and this experience will be an adventure, if nothing else!

What are the rules for needing a license?
The rule is simple. If you are a visitor for up to 3 months, then a driver from the UK can legally drive a vehicle in the Philippines. However, if you stay longer than three months, you must, by law, convert to a Philippine license. Seems simple enough, right?

Well, perhaps not simple as such, and hopefully this article will help guide you through it.

Visa Type
The first thing to understand is that as a visitor to the Philippines you are normally classed as a tourist, and are granted a visa as you arrive at the airport. You get a new red stamp in your passport, which gives you 30 days in the country. You can extend this visa by going through the required steps and paying the necessary fees, and (at the time of writing) you may remain a tourist in the country for up to three years. However, most people won’t be here that long, and for those who do wish to stay a bit more than a month can either do the extension (which will cost less than £100, but take a day of your life), or you can book a short flight out of the country (maybe to Hong Kong or Singapore) and then fly back in. If you do this, your 30 days starts again. This is a ‘visa run’ in ex-pat parlance, and ensures you get the 3 months of driving back.

As you will quickly see, one month visa, and three months driving seems a bit weird. For this reason a lot of longer stay visitors will extend the visa for two months, then do a visa run. It’s cheaper, and keeps things legal. However, what if there is another lockdown and you cannot fly out very easily? Or the country you’re going to has a lockdown? Or you realise that you must maintain an exit flight ticket from the Philippines at all times if you’re a tourist – you cannot fly back in on a visa run unless you can prove you’ve got a flight out again.

You could, of course, extend your tourist visa for longer, but the moment you do go over 60 days you also need an ACR-i card. This is a legal requirement and all foreigners must have one and carry it at all times. It’s going to cost you less than £100 and take another day of your life to go and get it, but you must have it. You’ll need it if you intend to get a driving license, anyway.

If you’re not a tourist, and in fact already have a long term visa, then the hardest part of your application is already sorted!

Requirements
The right thing to do if you’re staying longer than 3 months and driving in the country is to convert your license at the LTO. According to their website you’ll need to:

  • fully accomplish the required form
  • a medical certificate passing you as fit to drive
  • have a photocopy of your passport – the info page and the visa page with your date of entry
  • have a photocopy of your ACR-i card
  • have a photocopy of your valid UK license
  • have enough cash to pay the necessary fees
  • and have all the original documents with you as well (passport, driving license, ACR-i card).

But it’s not quite that simple.

Firstly, when you read the requirements it does not mention the fact that the time you’ve spent in the country is not what they are looking for. It’s the time you are going to spend here. Therefore, your visa must be valid for at least 6 months forwards. Now, different people say different things about this – is it 3 months, 6 months or (as some say) 12 months? I can reliably tell you that it is 6 months. But, you cannot get a tourist visa for 6 months – at least, I’ve never found a way! Maybe there is a route to a 6 month visa which I never found, but the most I was ever allowed to do was 2 months at a time. So even if it is the fabled 3 months required, you still cannot get it.

Secondly, it does not mention that you need to create an account on the LTO portal. This is basically the place where your driving record will be maintained, including any fines or fees for violations or other costs. You must register for this before you go to the LTO.

Medical Check
Also before you go to LTO, make sure you get a medical certificate from an approved practitioner, suitable tor LTO’s requirements. Just along from the LTO compound, walking distance along East Avenue, there is a ‘Chow King’ and above that are two LTO approved places. The actual ‘medical’ consists of you telling the ‘doctor’ your height and weight (they do have scales, etc, but don’t bother to use them), your blood type, and so on. They will ask you to do a simple eye test (read off a chart with each eye covered in turn), then ask for php500 and give you a certificate. Take that with you to LTO! A medical certificate is valid for 2 months, so you can get it done anywhere that is approved by LTO. It takes less than 10 mins at the one above Chow King.

Fixers – no thanks!
A word about those ever-so-helpful young men who greet you the moment you go to the medical office, or the LTO compound. For a small fee they will show you how to get into the medical room. Be warned – it’s up a flight of stairs and there are two – go to the furthest one and NOT the one the young man directs you to. It does not need a guide to show you the way. Be polite but firm and tell them ‘no thanks’ for their help. At the LTO there are even more, and for a fee will ‘guide’ you through the process. These are not legitimate guides, and they have no clue about the requirements for those of us from the UK. they are very familiar with simple conversions, but their help is neither needed, nor allowed! They will try to tell you they are approved, or that you must tell the guards they are your official helper, but do not be fooled. They are there to earn a few peso (how much is up to you, but you’ll not get change from php1000 if you are not careful), and they are not allowed. Some fixers will even apply as you, meaning you don’t even need to go into the building to begin with. Naturally, they don’t look British to begin with, won’t look like your photo on your passport, and you will need to hand your passport and driving license to a complete stranger you just met, so that they can ‘fix’ it all for you. Do not, under any circumstances, get tempted!

The Process
So let’s assume you’ve got a visa which is valid for at least 6 months to come. You’ve got the medical cert, the photocopies of everything, bags of small cash notes (exact amounts, please … you don’t get told that until you get to the LTO offices) and the fully filled out form. You happily approach the first of many service desk ‘windows’ to have your paperwork checked. they’ll take one look at your UK license and tell you that you come from a country that drives on the left, but in the Philippines the driving is on the right… and so you must also go and do a driving test.

Yes, you read that correctly.

There is a mandatory driving test for anyone from the UK wishing to convert to a Philippine license, and yet you will not find this requirement on any government website because they assume anyone reading their pages is from a right-hand-side driving country. You only get that piece of news when you get to the LTO. They’ll ask you to go to a completely different part of the compound, where you must then apply to go for a driving test. Keep in mind that you could drive legally (on the right) for three months, or even longer after a visa run, and you’ll soon begin to think it is a bit strange to then be asked to prove your capability to drive on the right after having done so for several months. You’ll think that even more once you have done the test itself – skip ahead to see the details of that! You’ll be pleased to learn you can do the test the same day, but will be unhappy to hear it is not done within the LTO compound itself.

Driving Center Building
At this new part of the compound, you queue (outside, no aircon) and the official will check your paperwork, and tell you again that you need to do a driving test, but it is also only at this point you’ll find you need 6 months on your visa. If your current UK license has expired, you will also need to do a theory test. Fortunately, mine is valid, so I only needed a practical exam. They sent me onwards to the next step of the process, which is to pay the fees before you go for your practical. The next step means joining another queue to to get a visitor permit to allow you into the Driving Center part of the compound. Leave a piece of ID with the guard and they give you a visitor badge. Once you have the visitor badge, you can proceed.

The Yellow Tent and LTO Portal
Just before you get to the building where all the magic happens, you’ll stop at ‘the yellow tent’ (which is not yellow, but has a yellow scaffold bar holding part of it up) and a rather surly young man busy playing a game on his cell phone will ask to see the paperwork (which has by now been checked twice already) and then ask you if you’ve registered on the LTO ‘portal’.

Yup. No-one told you this either! If you go all the way to the LTO and have not registered, you’ll be turned away. You need an account on the new and shiny (and it actually does work) LTO web portal. The good news is you could probably sit somewhere quietly with a phone and register, complete the details and so on. You’ll need decent internet, which is a mythical creature within the LTO compound. So make sure you do this BEFORE you go there!

Middle Names
A word of advice – middle names… they don’t mean the same thing in the Philippines as they do in the UK. If you’ve not got a middle name, you’ll still be asked for it repeatedly. It’s just not a thing here to not have one. Also, your middle name is likely to be your mother’s maiden name here. That’s not the case in the UK, of course, and so it can be confusing. The basic thing to remember is that your UK middle name is in fact part of your first name here, and not your middle name at all.

“Norman Stanley Fletcher”, for example, would be known as ‘Norman Stanley’… or ‘Fletcher, Norman Stanley’, and that is how they will call your name out when they want you to attend to something. Put ‘Norman’ and ‘Stanley’ as ‘firstname’ in the box provided, leave the ‘middle name’ empty and then put ‘Fletcher’ in the lastname field.

The Driving Center Itself
Getting past the yellow tent grumpy boss means you then enter the actual ‘Driving Center’ building (with aircon, but not much) and go to ‘window 2’. All the service counters have numbers on the glass, so you can’t get that wrong. When it is your turn, they’ll check your papers (fourth time) and then ask you to sit down. A few minutes (or an hour, depending if they are busy) later you’ll get called back to window 2 where you’ll be told you need to do a practical (again). By now you’ll be fine with the idea, and dead keen to get it over with. You agree, and they’ll ask you to sit again.

You then get called to a window to pay a fee – and there are two fees. The first is for your biometrics. Fingerprint scanning and photographs – it’ll cost php100 (about £1.60), and once you pay, you won’t get a receipt, but you’ll go and sit again. Eventually, you’ll get called to a different window, and there they’ll take fingerprints and photographs – this data sits on your record in the LTO portal, which is why you must have that account set up before you go. The second fee comes later.

You’ll then get called back to window 2, and handed your papers, and are told to go for the practical test.

“Great!”, you think…

Driving Test 
The practical driving center is 8km away, to the north of the LTO office. In Philippine driving conditions, that’s anywhere between 30 minutes and an hour… and remember, you do not yet have a valid license and so cannot drive there yourself. You need a friend to take you… or a taxi (but remember to also ask him to wait for you as you won’t get a taxi back if you don’t – there are no taxis going past that part of Quezon City at all – it’s quite remote).

The practical test is remarkably simple. You will use one of the cars provided (costs php250.00, or roughly £4), and you’ll need to follow a course that the examiner will tell you about before you start. There are four ‘straight’ roads about 100m long, a roundabout (rotunda), some junctions, walkways and traffic lights, plus the usual road signs you’ll see in the country. Make sure you know the meaning for all of these before you go there. You’ll drive out of the parking spot, along the route told to you, navigating the roadways and signs, and then back to the parking spot where you must reverse park between two orange cones. It’s a one hit moment – any single contact with anything fails you instantly. If you don’t hit anything, they will check your lane control, hand position, use of mirrors, indicators and so on. You’ll be given a grade and must reach at least 70 in order to pass. If you fail, you cannot re-take for 8 days… remember that’s 8 more days off your visa validity too, so be careful! There is no theory question, no driving on real roads, no freeway driving – just the very short route you’re given at the test centre, and it’ll be done in less than 5 minutes. They’ll stamp your papers with a pre-made stamp saying ’80’ and that’s what you’ll get as a pass.

Room A
Once you pass the practical, you go back to the LTO compound (another 30-60 minutes driving), and this time you can once again go to the ‘yellow tent’. Of course, to get there, you have to hand in a piece of valid ID again (such as your UK license… oh the irony) in exchange for a visitor pass, and then you can approach the yellow tent grumpy man once more. Equally surly as before, he’ll wave you back to the Driving Center, and once again you go to window 2… and they will immediately ask you to take your paperwork to Room A.

Now, room A is at the very end and behind the service counters. This is where you would normally do your theory test at a computer, but for me it was just a place to hand in my papers. You’ll then need to exit that room, back to the seating area and wait.

Deliverance
You will once again be called to pay money – for locals the fee is php585, but for foreigners it is php685. Call it a tax, if you like, but it is very common to pay more than the local do for anything. Once you’ve paid, there is no receipt, you go and sit and wait.

Eventually, you will be called to a window for the ‘release’ of your license. There, you’ll see your license in all it’s glory, but it is still not given to you yet. They check your address in the Philippines and insist on delivering it to that address. Apparently, in the past, some foreigners gave false addresses and were more difficult to catch when they broke the law. However, if you’re a local, they will hand you your license there and then. This gives me the distinct impression that Filipino’s never give fake addresses, but foreigners do…

You will, however, be given a photocopy of the license and a copy of your ‘Official Receipt’ which lists the payments made. This piece of paper means you can legally drive until the plastic arrives. For me, it was delivered the very next day, wrapped in receipts.

In total I went to the LTO 3 times on different occasions, with each time being told a slightly different piece of news or requirement that was not mentioned before, and which meant I had to leave and return a different day.  I also had two medicals, because the certificate expired between visits. I paid more than I should because of this, but it is all part of my ‘training’ in the ways of the LTO! Hopefully my notes here will help you not spend as much and also get it done in one go, not three!

Remember:

  1. create an account on LTO portal
  2. make sure you’ve got at least 6 months left on your visa
  3. make sure you’ve got a valid ACR-i card
  4. go for your medical checkup – php500 – certificate valid for 2 months only
  5. download and complete the application form
  6. make a photocopy of your passport, plus visa page, ACR-i card, UK license (both sides). If in doubt, photocopy it and take it with you.
  7. you’ll pay for the Biometrics scan, php100
  8. you’ll pay for the Driving Test vehicle hire, php250
  9. you’ll need a taxi to and from the test center (or get a friend to drive you) – variable fee depending on the driver!
  10. you’ll pay the License fee at the LTO, php685

Total of php1535.00, plus fares to and from the compound and to and from the driving center.

Prepare yourself for a day off work. I arrived at the compound at 10am, and finally left with the license at 3pm.

Oh, and prepare yourself for renewals too. The Philippine driving license is valid for five years, after which it must be renewed. As long as you’ve got all the same valid pieces of paperwork, you can renew it at a satellite office near to where you live (if there is one), and won’t need to do another test. What a relief that will be.

Philippines Emigration Clearance Certificate (ECC) – how to get your ECC and stay sane

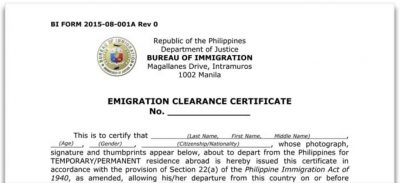
If you’re a tourist in the Philippines and have stayed more than 6 months, you’ll need to have a clearance certificate issued before you’re allowed to leave. To the best of my understanding, this is a check on your status, whether you’ve paid up all your visa dues, and whether or not there is any adverse record of you from your time in the country. As a responsible person you will of course have ensured your visa extensions are all in place and paid up, you’ll have your ACR-i card paid up and you’ll not be in trouble with the law – no traffic violations or any of that kind of thing. All of this will be checked as part of the process, so just be sure you’ve got all you need paid up and dealt with before you go to get your ECC.

The Website for the Bureau of Immigration (BI) has a downloadable form for the exit certificate, and a list of requirements which is actually not a complete list. There are also plenty of websites available to help you so in some respects my information here may be superflous. However, I went through the process today, and dealt with the Makati office (an extension office to the main one in Intramuros). Some of what I had to do is not detailed in the various official websites or indeed in some of the other helpful resources you may get to read.

The BI instructions tell you that these are the requirements for the application of ECC:

  • Application Form
  • 6 pieces of 2×2 ID picture
  • Photocopy of Passport (bio page, visa page, and latest arrival)
  • Photocopy of receipt of latest visa extension
  • Original and Photocopy of ACR I-Card
  • Photocopy of order of downgrading (*if applicable)

In fact, I used four ID pictures, and had to photocopy BOTH sides of the ACR-i card. They also required ALL of the visa extension receipts I had, not just the latest one. I have been in the country for a little over two years, since the pandemic lockdowns began, so I had a few to do. Make sure you complete the application form, sign and date it.

The original ACR-i card and original passport will be visually checked at the time, too. Make sure you have them with you, along with the copies.

Location

5th Floor, Circuit Mall, Makati.

The BI website tells you the extension is in JP Rizal, just about opposite the Makati City Hall, but that is now incorrect. They moved to Circuit Mall during April 2022, which is actually a much better place for you to go to.

When you get to Circuit (front entrance), go up in the elevator opposite the McDonald’s outlet and exit to your right on the 5th floor, you’ll see signage pointing the way there.

In the best ‘boy scout’ tradition, be prepared! The golden rule before you get there is to photocopy everything you think you’ll need.

  • Photocopy your Passport ID page.
  • Photocopy your Passport page with the last entry stamp to the country.
  • Photocopy any receipts you’ve got for ACR-i card payments, visa payments made, or any other official fees you’ve paid during your stay. Don’t omit any, they check all of it.
  • Photocopy your ACR-i card – both sides.

Then, go to a photo studio and get a set of 4 2″x2″ photographs. You’ll need these – get 6 done, just in case, but you will only need 4! The cost for this varies from place to place, but expect to pay between 75PHP and 120PHP.

  • Take a pen with you, undoubtedly you’re going to need to complete other paperwork.
  • Take your passport and ACR-i card, too.
  • Remember to take your reading glasses, if you use any.

The Office

As you walk in the door, you’ll be greeted by a person who will ask the nature of your business there. It’s like a triage system – don’t be offended, just explain your purpose and they will advise you what to do. It’s to help the staff filter the sometimes very heavy traffic through their doors, and to stop those who don’t need to from getting to the actual BI officers.

Once past the initial check, you’ll be seated, and called in turn. There are multiple windows, but in Makati, for the ECC process, I was guided to Window 9. There was one person in front of me, the office was fairly empty (Tuesday morning, 11am), and a member of staff came out to the waiting area and did a quick check on the paperwork I’d brought with me. I’d actually missed a few photocopies, but they were very patient, and much more friendly than I’d previously experienced in government offices. Fortunately in Circuit Mall there is a National Book Store on the ground floor, and they will do your photocopies there. If you need photographs, then also on the ground floor, just outside the ‘Shopwise’ supermarket you’ll find a photographic studio who will do the necessary (go grab a coffee whilst you wait for them to be processed). If you want a suit and tie for your image they’ll photoshop that on for an additional fee, but I declined – I wasn’t wearing one and thought it would be weird to go back with images showing me in that.

Protocols!

Whenever you go to ANY government building in the Philippines, be sure to wear smart clothing. No shorts, no sandals/flip-flops and no bare arms – ‘cover up’ applies to male and female visitors equally. Be polite, be courteous and respectful. If you are not, you will be turned away. There is no point getting grumpy with the officials, they are not going to help you if you are – just keep in mind they control your future – be mindful of that! If you struggle to hear, or understand the accent, tell them so – they’ll go over anything you need. They want to help – they’re not trying to trip you up over the process.

Fingerprints

Once back with the paperwork in place, having filled in another form, I then had to go back to Window 9, where they do a fingerprint scan and facial photograph using a web cam. The fingerprints went in order – left hand first, pinky finger through to thumb, then right hand, thumb through to pinky. I guess they check police records for any matches or for any derogatory records about you.

Once the scan is done and basic checks made, they will issue a paper payment slip. You’ll be sent to a cashier’s window where you’ll pay whatever fee is due. If the office is busy, you’ll sit in line and shuffle between seats as people get up to be seen to. If the office is empty, as it was for me, you’ll go direct to the window. Once you’ve paid, you’ll go back to the Window 9 officer… waiting again until they are free. If you’re lucky, and the office is empty, you’ll go to them right away.

They will then issue a receipt and you will think that is the end of the process… but it is not. You will need to return in 3 days to collect the actual certificate, and you’ll need to present this at the airport as you check in for your flight and go through security there. The time allows for a full search of police and government records, and there is no shortcut to this.

Leave enough time for this ECC process! I was told that you cannot start the ECC process if there is more than a week until your flight (despite the clearance certificate being valid for a month), but clearly you must allow at least 72 hours for the entire process. I strongly advise you to go a week before the flight, not more, and get all your paperwork in place before you attend. Do not leave it to the last minute – this process does not work at the weekends, and you cannot pay it at the airport. Be very mindful of public holidays, or official events interrupting your time available, too.

In an empty office, with no queues, it took me less than an hour from start to finish, including getting some photocopies done. On a busy day it’ll take longer and I would advise allowing at least 2 hours for the process.

Vaccination Certificates

You will not need your vaccination certificate for the process to exit the country, but you will certainly need it if you are returning at some point. If you’ve not done it but have had your jabs in the country, go to https://vaxcert.doh.gov.ph/and enter your information there (all dates and locations of the vaccinations, and you’ll have to have had at least one booster) – you’ll be able to download a certificate to use when you return to the country. Keep it safe until then!

At the time of writing, the Philippines borders are open to tourists with a valid record of vaccination from a country that has recognized protocols and procedures. In my case, I was vaccinated in the Philippines, and so I am hoping that is enough to let me back in!

Conclusion

  • Be prepared. Photocopy everything you’re going to need – you may as well make two copies, just in case – it’s reaonably cheap to do. Get your photographs done, they must be recent (within the last 3 months) and take a pen with you.
  • Even though the clearance is valid for one month, you won’t be allowed to get it more than a week before your flight. It takes 72 hours to process, so allow enough time for that to go through before you have to get to the airport. I was flying out on a Monday afternoon, so I went to the office on the preceding Tuesday, six days in advance of the flight.
  • Remember to dress respectfully, and to be courteous and polite. Don’t lose your temper with the frustrations from the bureaucracy involved – just go patiently through it all, and the staff will really help and guide you. If you get upset with them, expect them to send you on your way. It’s your loss, not theirs!
  • Allow a couple of hours. There are plenty of food outlets in the mall if you need to eat, and it’s a much better location than where the old office was on JP Rizal. There is at least parking too – anyone who has been through this process before may well remember the even older location along Senator Gil J. Puyat Avenue(Buendia Ave), but that office closed a while back. Not only was there no parking, but a taxi could not stop to let you out by the front of the building as it was along a highway with railings. Circuit is a much better place for a government office.

Sequel Pro not working on OSX Big Sur, use Sequel Ace!

Well, it finally happened. I upgraded my OS to Big Sur and as expected a number of issues arose due to incompatible software. This is further compounded by moving off Intel chips to the new Apple M1 chip. Yes, it’s a lovely piece of silicon, and is a good deal faster to use in day to day operations than the older Intel designed chip, but of course has introduced a few snags. The main one being anything ‘Microsoft’ now won’t work – for example, running VMWare and having a Windows virtual machine just isn’t happening right now. The code doesn’t exist to allow Windows to run on the M1 chip.

However, by far the biggest issue (for me) is the lowly ‘Sequel Pro’ software I’ve been using for years to access databases on different servers. It won’t work, and since it is not being actively developed, will never work on Big Sur.

RIP, Sequel Pro… and welcome to Sequel Ace!

Sequel Ace is available in the Apple App store, and is the new database management tool, maintained by developers from Sequel Pro. It’s updated and works on my M1 and Big Sur. Whoop!

“What about all those saved favourites…?” I hear you cry! And you’re right – there is a bit of work to do if you’ve got some favourites that you need to open on Sequel Ace that you used to have on Sequel Pro. Fortunately, you’ve got a few options.

Firstly, did you happen to keep a note of your passwords for each database somewhere handy? If so, you’ll be best off just re-creating those favourites, by typing in the credentials for each that you need. If not, you’ve got some work to do, diving into the guts of your OS and moving things around.

As with anything, please make a backup of the files and work on the copies, rather than the originals… just in case!

Then, search google for Harry Bailey’s excellent article on Medium.com – it’s all there:

https://medium.com/@harrybailey/migration-from-sequel-pro-to-sequel-ace-c6a579399c90

I don’t take any responsibility for the details in the article, but I read through it and it seemed perfectly reasonable to me. However, I’m one of those that has a local copy (encrypted of course) of things like database passwords.

One other thing, when connecting through SSH, Sequel Ace doesn’t automatically search for your .pem files in the ~/.ssh folder so you will need to navigate around. If you frequently use your .pem files, then Sequel Pro will offer you a handy ‘recent locations’ option to get to wherever you store your .pem’s.

It’s very early days – I downloaded and installed Sequel Ace earlier today, but so far I am impressed with the speed of it. The earlier version (‘Pro’) was not slow, and perhaps it’s the new M1 chip I am experiencing, but Sequel Ace seems fast. It also returns some of the features I have missed in the last versions of ‘Pro’, and offers more besides. I am not a ‘power user’ by any means, but I am sure many Mac users who need to access databases will find Sequel Ace the right tool for the job.

Metro Manila’s ‘Skyway’ extension to the north

I had the absolute pleasure of driving along the newly opened Skyway Extension in Metro Manila, which now connects the South Luzon Expressway (SLEX) directly to the North Luzon Expressway (NLEX), meaning travellers no longer have to do battle through the heavily congested metropolis to go from south of Manila to the north.

Joining Skyway northbound from the city of Makati means a few hundred meters of driving along Osmeña Highway, just beyond the junction with Buendia Ave. This new extension takes you right up to the Balintawak toll booths and from there directly on to NLEX itself. The old way of doing this would have been to work your way along EDSA (Epifanio de los Santos Avenue), which has long been known as a trouble spot for traffic, or winding your way through multiple hotspots going through Makati into Manila and on to Quezon City. Driving along EDSA means being in the right lane at the right time is crucial to avoiding traffic violations and fines, as well as hitting the right exit points – it is almost an art form
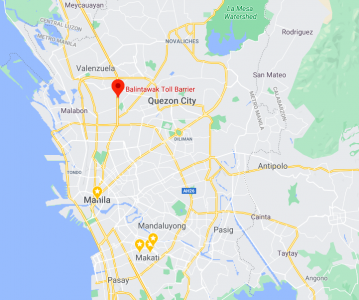
. Anyone who has ever driven in Manila will know what I mean, although local drivers seem to take it all in their stride. Getting to NLEX from Makati previously would have taken anything up to 2 hours for a 15km journey, depending on the time of day and the amount of traffic.

The Skyway extension avoids all of that, and gets you to NLEX from Makati in just over 15 minutes.

You read that correctly! I joined Skyway, maintained a steady speed at the signposted 60kmh all the way to Balintawak and started the clock ticking as I hit the on ramp. By the time I got to Balintawak, just 15 minutes had passed. I had to do a double-take, and once I had confirmed it, drove on to NLEX to see how that went. In not much more than 20 minutes I was at Balagtas. That’s about 35 minutes to get to Balagtas from Makati – a notional distance of about 40km, which is much shorter on Skyway. This not only saves fuel, wear and tear on the car and driver patience, but also relieves traffic along the much troubled EDSA route.

This makes a day trip to Baguio possible – normally allowing around 6-8 hours for that journey each way, it can now be completed in a respectable 3-4 hours only… assuming NLEX and local roads further north are not too congested.

I have to say I couldn’t quite believe the timing myself, so I turned around at Balagtas and returned to Makati, and there it was again. Just over 30 minutes to the off ramp at Buendia avenue.

This is a bit of a game changer to say the least. Yes, eventually there will be tolls once the charging matrix has been sorted out, and yes, it’ll be expensive compared to sitting on EDSA, but time is also money. For me, I’d save the time and spend the money on the tolls just to be so quickly in the north. After all, getting old sitting in a queue of frustrated drivers all jostling for position in an incredibly busy road for two hours is no fun. Cruising gracefully along Skyway for 15 minutes to get to the same place for a reasonable fee works much better for me. Rumour has it that fee might be anything up to 240 Pesos one way, but I hope it is less! (For reference, that’s roughly GBP£4.00, or just under, at the time of writing).

Well done, to the architects and construction companies for this scheme, and to those who funded it. This is a truly  excellent development, and an absolute game changer for travellers.

I tip my hat to you.

Running WordPress on AWS – some experiences, problems and solutions

If you’ve found this post it’ll be because like me, you had issues setting up WordPress to run on AWS. However, it does work, and if you solve each of the issues one by one you’ll get to see WordPress running efficiently and well.

First off, some basics. I am using Linux, v 20.04. It has MySQL 8.0.22 and PHP 7.4.3. I updated to WordPress 5.6, and found a few things not running any more.

1 – plugins – some incompatibility, and requiring updates, but auto update didn’t work. Worse, WordPress asks for FTP settings so I can have it manage the process, and I am not about to install FTP onto the server.

2 – email sending used to be fine, but now no longer runs as it used to

3 – editing any text, anywhere was a problem – the changes could not be saved

4 – ReCaptcha not appearing on forms.

Auto Update

WordPress used to be painful to update. Years ago it involved logging on to your server, creating backups, copying files over the top of existing files and directories and hoping for the best. Nowadays it is a lot easier, and in the WordPress dashboard you should be able to simply click a button and get the updates.

However, when you do, you are presented with the WordPress FTP panel asking for a hostname, username and password, and giving you the option of FTP or SFTP. Neither worked at all for me, ever. And no chance of working on AWS either because of the use of PEM (or PPK) security files to actually log in to the server. WordPress has no way of handling those, so it simply won’t work. Fortunately, all you do is make a small edit to the wp-config.php file on your server and the FTP dialog disappears.

To get rid of this, you’ll need to edit your wp-confg.php file and add a simple line of code. Some people say add it at the bottom as the last line, but I found that didn’t work. Instead, I added it to be just above the database connection settings:

define(‘FS_METHOD’,’direct’);

In the latest WordPress versions, it’ll be about line 22 or 23. Add it in before you get the database definition statements and save the file.

When you next try to auto update you’ll see no FTP dialogue box.

What this addition does it tells WordPress to use a ‘direct’ method of writing to the server, and not use FTP. However, there may be a second issue for you when you do this.

File Ownership and Permissions

Whenever you move files onto a server, they are given certain attributes, and on Linux these will include who owns them, and who has permission to modify them. You may think of yourself as the owner, and you’d be right… but the server itself runs certain applications (such as your web server – probably Apache or NginX) and each of these is like you – they have a role on the server to do their job, so the server considers them also able to own and manipulate files.

The second thing to remember is that you as a user exist on the server in a ‘group’ which has certain privileges. Other users can exist in this group too, and the group has overall permissions. If you upload files, they also belong to the group and have the permissions afforded to the group. For example, let’s say your login to the server uses a name ‘Ubuntu’ – then the files belong to ‘Ubuntu’ and are in the group for ‘Ubuntu’. The problem is, the web server isn’t in that group, so can’t get to the files to do what WordPress needs. Whilst you can read and edit them because you are in that group, no-one else can. They may be able to read them, but writing changes? That is not going to be allowed.

So you have to make sure that WordPress has the ability to read and write to the files, but that the files are protected from malicious actions. Fortunately, it’s not too hard to achieve and there are many resources on the web telling you the exact file and directory permissions to use. However, you must ALSO grant the web server the right to use the files if you want WordPress (which uses the web server to do the work) to be able to update them.

In the world of Ubuntu, the Web Server is given a name and group called ‘www-data’.

You therefore need to change the owner and the group for each of your WordPress files and directories, and maintain the overall security using the file permissions. Don’t worry, you’ll still be able to access and edit them yourself if you need to, but mostly, you won’t have to.

Open up your terminal and connect to your server, and navigate to your WordPress installation. All of the files and folders within it need to be assigned to the www-data user:

chown -R www-data:www-data /var/www/html/wordpress

This literally means ‘CHange OWNership Recursively to be owned by www-data and in the group for www-data in the directory where WordPress lives. Note that the location I’ve shown in this example  (/var/www/html/wordpress) may not be the same on your server.

If you log in to your WordPress Dashboard after making these two changes (using a direct method of update and getting the permissions right) you should have the ability to auto update your WordPress site without resorting to logging in to the server directly. It can all be achieved from within your Dashboard, and that’s a lot simpler! If you do want to edit the files in the server directly, you’ll find you no longer own them, and so will need to log in as the root user or use the ‘Sudo’ command to access them.

Email Sending

It used to be quite simple to send email from WordPress on any other server except AWS, it just worked. However Amazon in their wisdom have prevented you sending email directly, because they have blocked port 25. This is the port that SMTP uses, and so mail cannot leave your server. It’s a great way to reduce the chance of AWS servers being used for Spam and Spam relays, but it’s a nuisance for those of us just wanting to host a site and have it send out alerts and messages. You have two options:

1 – contact Amazon from your console panel and ask them to lift Port 25 restrictions. They do listen, and are sympathetic, but not daft. You may wait a day or two before it is done, and when it is done they may apply other requirements.. such as using their Simple Email Service (SES) to ensure Spam and malicious emails are under control.

2 – use a different SMTP relay which goes through a different route. There are many such services on the web and all you need to do is install a suitable WordPress plugin to allow you to bypass the built in functions and use your SMTP server such as Google, or any other mail service.

Look for ‘Easy WP SMTP’ 
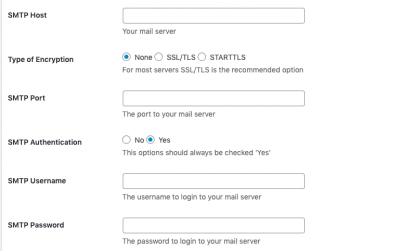
as a plugin which gives you many options and the obvious ones for SMTP. Just put in the details required, and WordPress will route your mail out that way. Keep in mind that port 25 is not the only way to send mail, and different providers use alternatives, such as 587. This is fortunately not blocked by Amazon, and so email will once again ‘just work.

Text Editing

The latest version of WordPress continues with the ‘Gutenberg’ text editor, which when running well, works nicely. However, I had the problem of it not updating the text, and I miss the old ‘classic’ editor I’ve come to love. Luckily, you can restore the old editor, and get that retro feel, and at the same time fix the errors in Gutenberg.

It’s another plugin, this time called ‘Classic Editor’. Just install it, check the settings and enjoy text editing working once again.

ReCaptcha

If you have ever used WordPress before you’ll know how much of a target it is for security. It is so important to keep things under control, and that includes your forms and other places where users can write content on to your pages.

I use the Contact Forms 7 plugin which gives me a nice simple interface for creating any number of forms that I might need, and also now supports Captcha from Google. You’ve all seen these – small puzzles that you must solve before accessing or sending content – often involving traffic lights, or pictures of store fronts.

The problem was when I updated Contact Forms, the captcha just didn’t appear. In earlier versions it was completely removed, but the ability to use Captcha was reintroduced and it is worth using it to prevent a lot of problems with forms and content entry being taken over by bots. So I was dismayed to lose the captcha, and did a bit of investigating. there are two types of Captcha – v2 and v3. The latest version of Contact Forms uses v3 by default, and so you need to provide v3 credentials. Go to Google, sign up for a ReCaptcha account and add an entry for the domain you want to protect. Enter the secret key and public key Google gives you in the WordPress plugin and you are nearly done.

You also have to add the reCaptcha to your form layout.

You also need to make sure that the version of PHP that you are running has the right libraries to support it!

Let’s add the code to the form layout. Here is a simple example of a contact form using the ReCaptcha codes (WordPress short codes). Check the last but one line:


Note the codes in this version I am using

[captchac captcha-1] [captchar captcha-1]

This is calling two parts of PHP from your server in order to create the effect. Firstly, Captcha uses an image and secondly it needs you to type text. If you don’t add this into your form, then Captcha won’t show.

When it is added, the captcha appears under your form, as in the template layout.


By far the biggest issue for me was the file permissions and ownership, and once that had been done the auto-updates just worked. But also, the auto install of new plugins, removal of old ones, pretty much everything I want to achieve is possible from within WordPress now. No longer any need for me to log into the server and use the tools built in there, and this means keeping WordPress up-to-date will be easier, so there’s less of an excuse not to!

A brief word on security.

WordPress has long been the target of attacks on servers and is one of the main reasons for server slow down and other problems. It is such an issue that you need a robust security plan to be in place when you run WordPress. Fortunately, there are many plugins to help, and you will no doubt have fun reading reviews on them all, but I am much more relieved to see some significant improvements to security tools built right into WordPress and available to any administrator to see the issues and possibly to fix them too.

The WP Security tab is a huge step forward, in my opinion.

I am not a server administrator, and am not really familiar with of all the nasty things hackers can do, but at least there is some comfort from knowing I have better tools to help me now than I had when WordPress first came out all those years ago. I’ll keep using it for a while longer, I guess!

Happy ‘pressing!